Installation & Configuration
This guide covers installing the Collaborative Editing extension either manually or from the Directus Marketplace, configuring collaboration settings, and verifying that real-time collaboration is working in your project.
Before You Start
Before installing the Collaborative Editing extension, ensure you have:
- Admin access to your Directus project
- Directus 11.8.0 or higher installed and running
- WebSocket support enabled in your Directus configuration
- Extension installation permissions on your server or hosting environment
Collaborative editing requires WebSocket support to function. Make sure your Directus instance has WebSockets properly configured according to the official WebSocket documentation.
Installation
From Directus Marketplace
- Navigate to your Directus admin panel
- Go to Settings → Marketplace
- Search for "Collaborative Editing"
- Click Install on the
@directus-labs/collaborative-editingextension
If you want to install from the Directus Marketplace, set the
MARKETPLACE_TRUST variable in your Directus Configuration to all. Be extremely careful about installing any extensions from untrusted sources. Learn more about extensions and the sandboxed extensions.Manual Installation
For other installation methods:
npm install @directus-labs/collaborative-editing
Then follow the Official Guide for manual extension installation.
Self-Hosted Docker Installation
For self-hosted Directus projects using Docker, you need to build a custom image to include the extension:
1. Modify Docker Compose File
In your docker-compose.yml file, delete the image property and add a build section to the directus service:
services:
  directus:
    build:
      context: ./
    # Remove the image: directus/directus:latest line
2. Create a Dockerfile
At the root of your project, create a file called Dockerfile:
FROM directus/directus:latest

USER root
RUN corepack enable
USER node

RUN pnpm install @directus-labs/collaborative-editing
# You can add any other extensions you want here as well
3. Build and Run
Build your Docker image and start the container:
docker compose build
docker compose up
After starting the container, navigate to your Directus admin panel. Go to Settings → Extensions to verify that "Collaborative Editing" appears in the extensions list.
Enterprise Installation
For Directus Enterprise customers with custom extensions repositories:
- Pull the Extension: Clone the extension from the Directus Labs repository
- Build Locally: Build the extension following your standard development process
- Add to Extensions Repository: Place the built extension in your extensions repository directory
- Create Pull Request: Follow your organization's review and merge process
- Wait for Deployment: After merging, the extension will be available in your project within 5-15 minutes
If you're unfamiliar with this process, contact the Directus support team for assistance.
Configuration
Enable the Module
After installation, you need to enable the Collaborative Editing module:
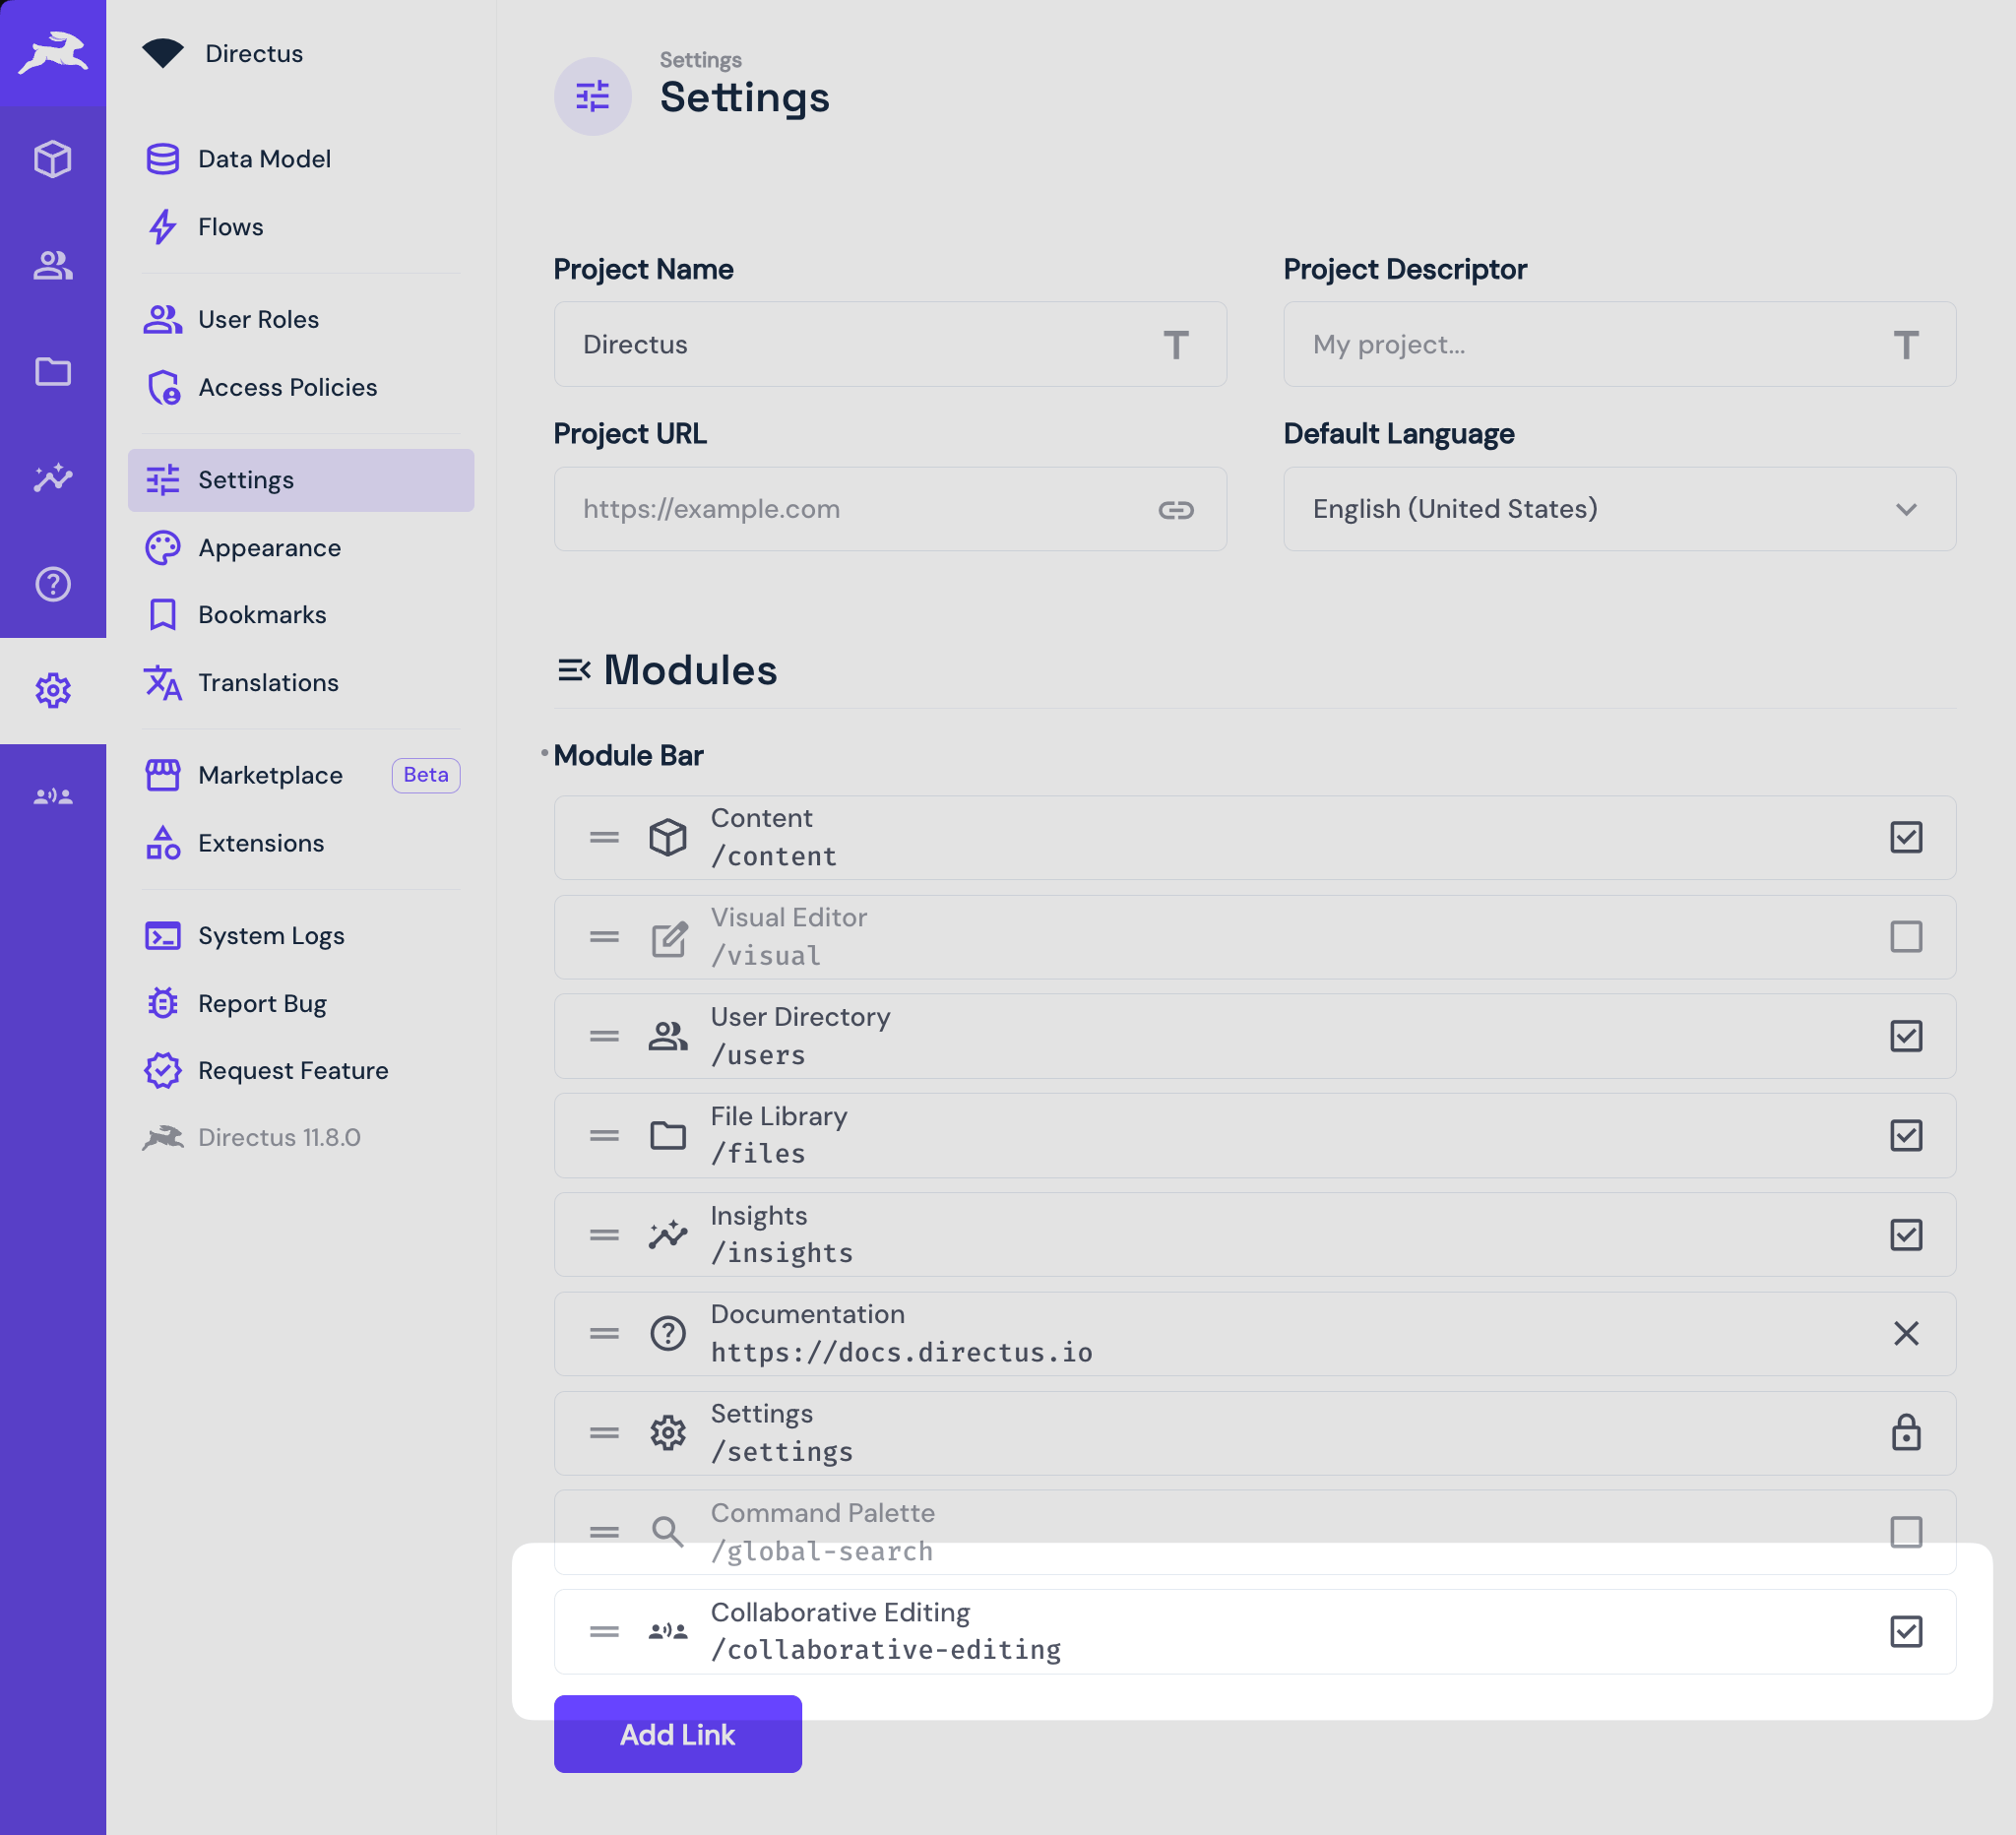
- Navigate to Module Settings:
- Go to Settings → Module Bar
- Find "Collaborative Editing" in the list
- Toggle it ON to enable the module
- Don't forget to Save the settings
- Access the Module:
- The Collaborative Editing icon will now appear in your module bar
- Click the icon to access the configuration settings
Configure Collaboration Settings
When you first access the Collaborative Editing module, you'll see a message that settings are missing. Click Create Collaborative Editing Settings to automatically generate the necessary configuration:
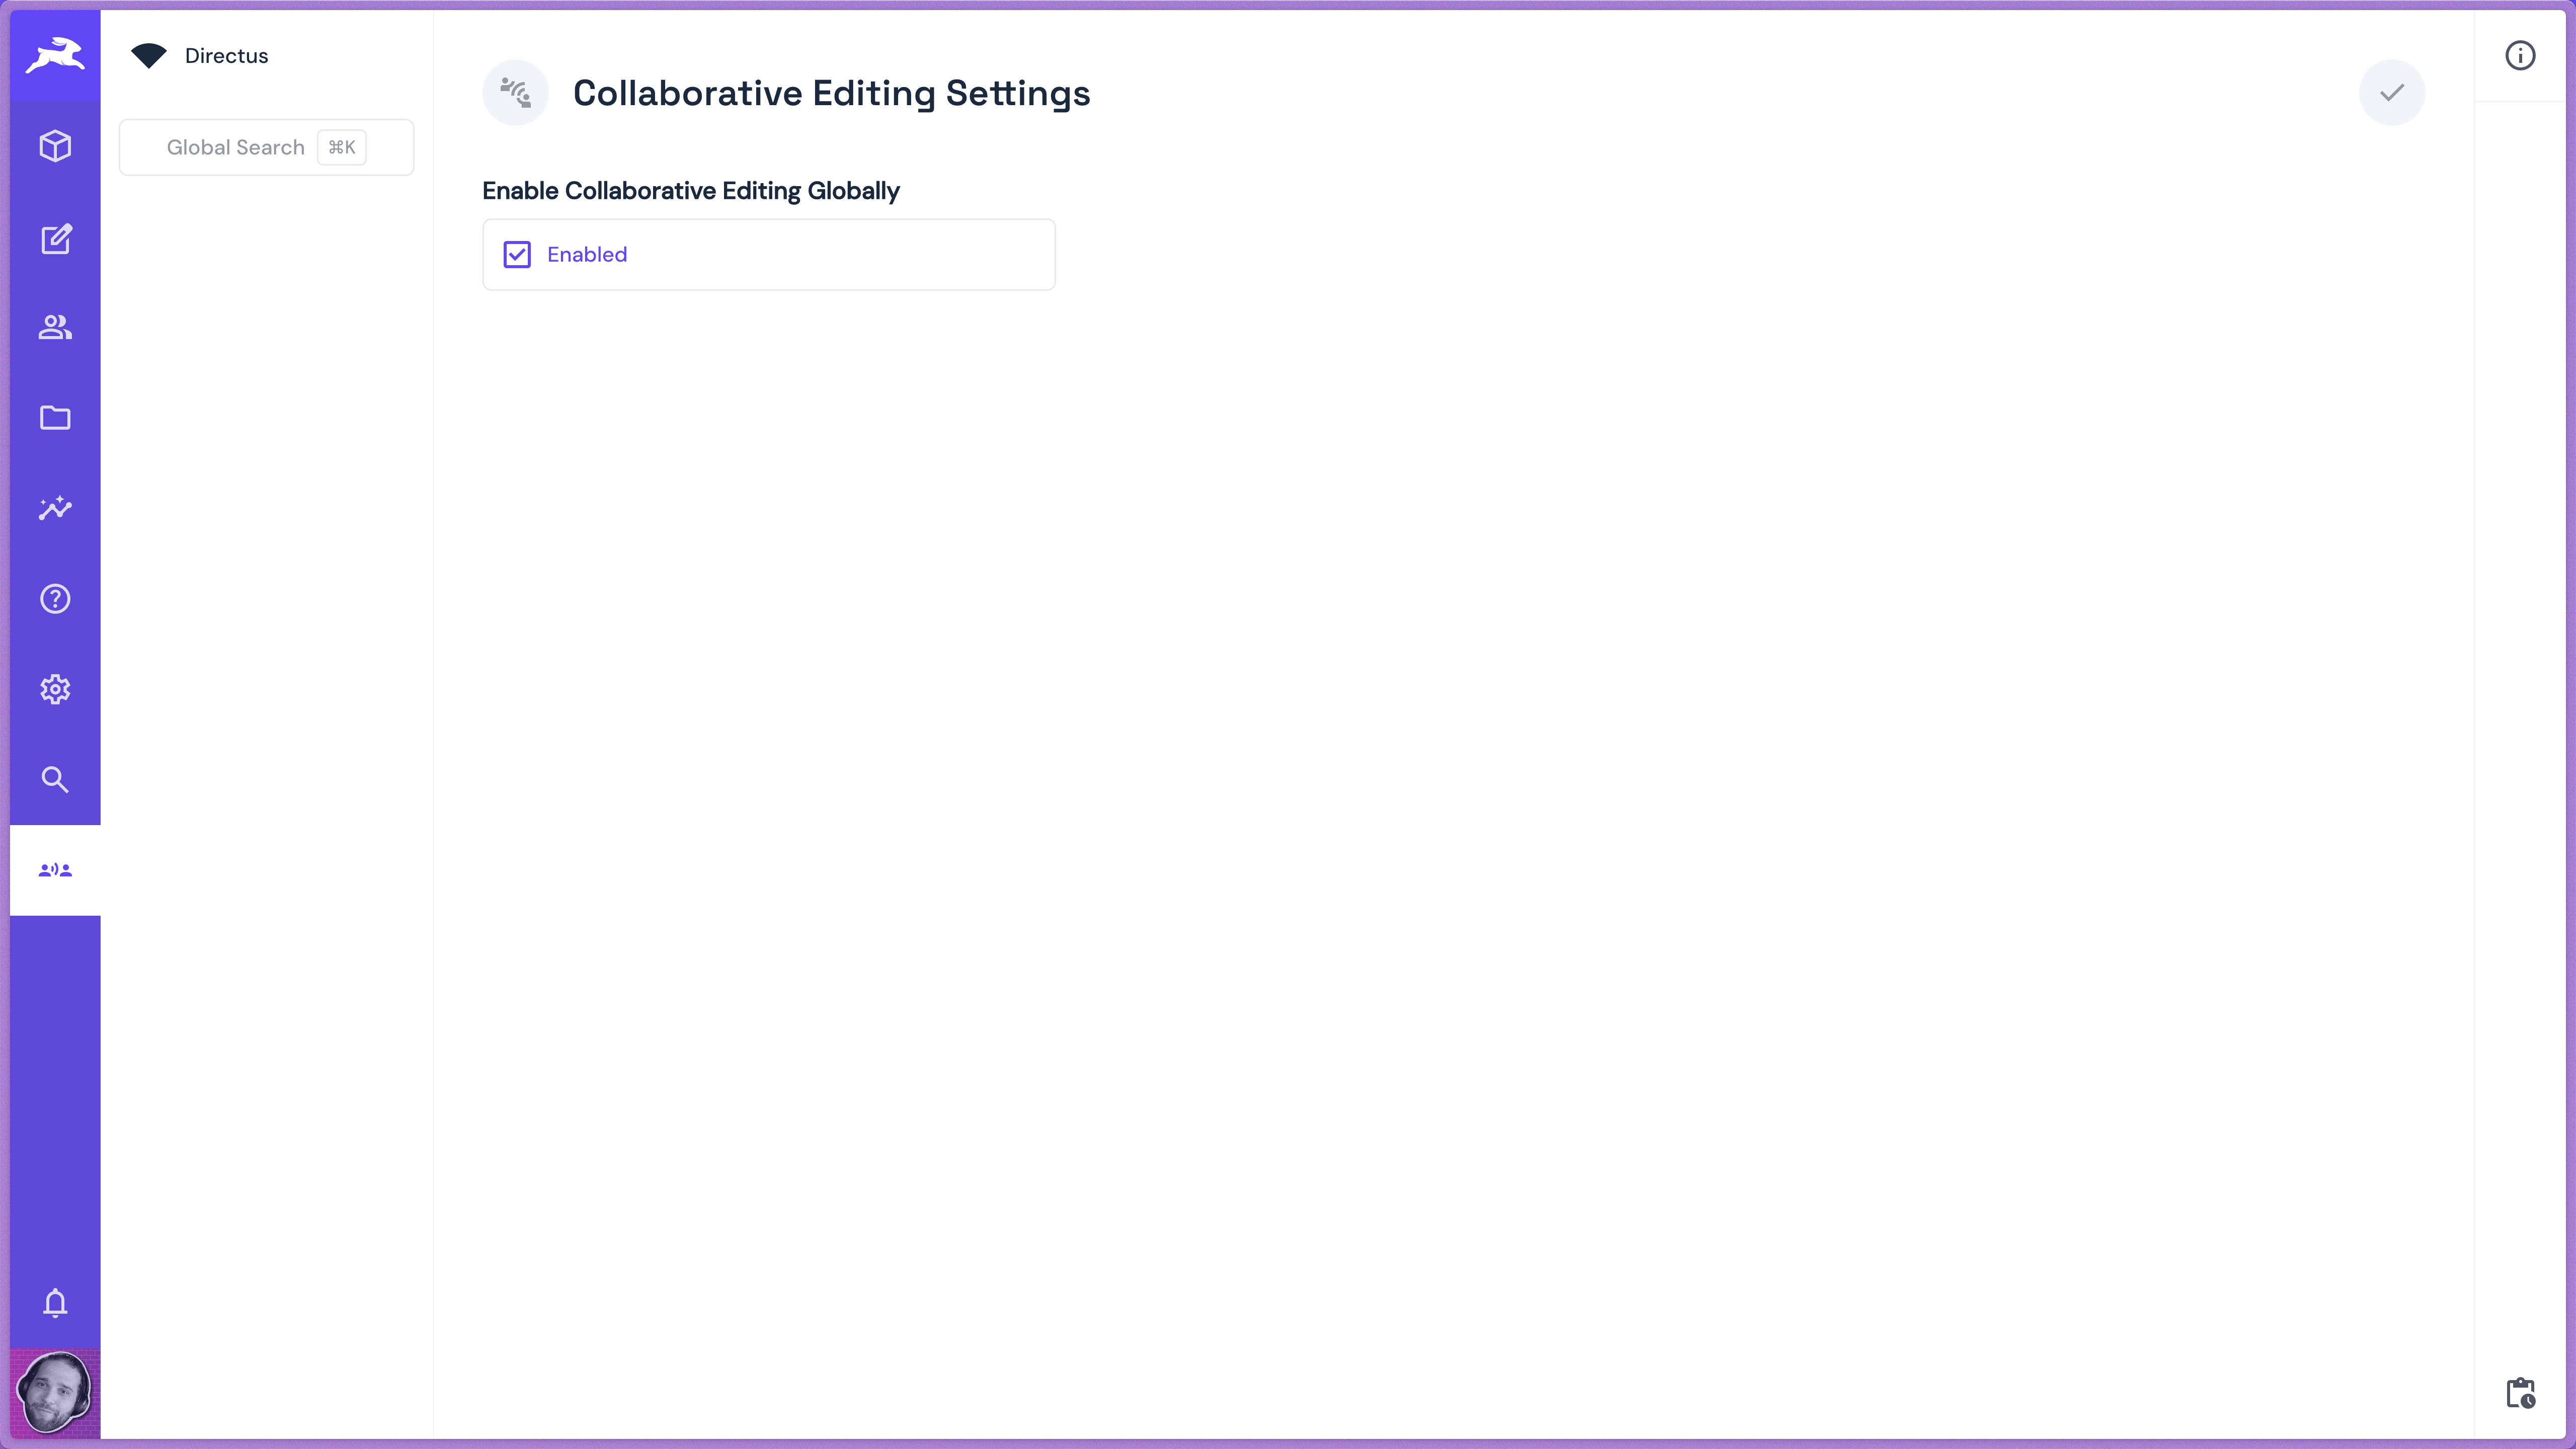
Global Approach (Recommended)
By default, collaborative editing is enabled globally across your entire Directus project:
- Enable Collaborative Editing Globally - Toggle to enable collaboration across all collections, file library, and user directory
- This is the easiest method and works immediately
- Provides collaboration everywhere without additional setup
Selective Approach
For more granular control, you can disable global collaboration and enable it per collection:
- Disable Global Setting:
- Turn off "Enable Collaborative Editing Globally" in the module settings
- Enable Per Collection:
- Navigate to your collection's Data Model settings
- Click Create Field
- Search for and add the "Collaboration" interface
- Set the field type as Alias with Presentation display
- Save the field configuration
This approach works well for projects with sensitive data where you need more granular control over which collections support collaboration.
Verification
To verify the installation is working correctly:
- Check Extensions: Navigate to Settings → Extensions and confirm "Collaborative Editing" is listed
- Enable Module: Go to Settings → Module Bar, check the Collaborative Editing box, and save
- Create Settings: Access the Collaborative Editing module and click Create Collaborative Editing Settings
- Test Collaboration: Open any collection item and look for the small collaboration icon showing your user avatar
- Multi-User Test: Have another user open the same item - you should see their avatar appear when they edit different fields
Troubleshooting
Potential Issues
Module Not Appearing
- Verify the extension is properly installed
- Check that the module is enabled in Settings → Module Bar
- Restart your Directus project if needed
WebSocket Connection Failed
- Confirm
WEBSOCKETS_ENABLED=trueis set in your environment - Check your server configuration supports WebSocket connections
- Verify firewall settings allow WebSocket traffic
Settings Not Saving
- Ensure your user has admin permissions
- Check the browser console for any JavaScript errors
- Verify database write permissions
Debug Logging
Enable debug logging to troubleshoot issues.
REALTIME_LOGS_ENABLED=true
This will provide detailed information about WebSocket connections, user events, and collaboration activities in your Directus logs.
If you encounter issues during installation or configuration, check the Directus Community Forum or create an issue in the Extensions Repository.
Summary
You have successfully installed and configured the Collaborative Editing extension for your Directus project. The extension is now ready to provide real-time collaboration features across your collections, file library, and user management.
Next Steps:
- Review the Usage Guide to learn how to use collaborative editing features
- Test the collaboration features with your team members
- If you develop custom interfaces, check the Development Guide for integration instructions
Get once-a-month release notes & real‑world code tips...no fluff. 🐰
Collaborative Editing
The Directus Collaborative Editing extension enables real-time data synchronization and collaborative editing across collections, allowing multiple users to edit content simultaneously without conflicts.
Usage Guide
Learn how to use the Collaborative Editing extension for real-time collaboration on content in your Directus project.