Using Authentication in Astro
Authentication is a critical part of any modern web application, ensuring that users can securely access their data and perform authorized actions. In this tutorial, you will learn how to implement authentication in your Astro application using Directus' built-in authentication system.
Before You Start
You will need:
- A Directus project with admin access.
- Fundamental understanding of Astro concepts.
- Optional but recommended: Familiarity with data modeling in Directus.
Set Up Your Directus Project
Before building our authentication system, let's configure Directus with the necessary collections and permissions.
Create a Collection
Create a new collection called 'posts' with the user_created optional field and the following custom fields:
title(Type: String)content(Type: Markdown)author(Type: A Many to one relation to thedirectus_userscollection)
Configure Roles, Policies, and Permissions
Create a new role called 'Authenticated User'. In this role, you will create a number of policies.
Create a 'Can Read and Create Posts' policy with the following permissions for the posts collection:
- Read: Allow
- Create: Custom
- In Field Permissions, uncheck
authorso the user cannot set any value. - In Field Presets, add the following value to set the value automatically:
- In Field Permissions, uncheck
{
    "author": "$CURRENT_USER"
}
Create a 'Can Edit and Delete Own Posts' policy with the following permissions for the posts collection:
- Update: Custom
- In Item Permissions, set
user_createdto$CURRENT_USERto only allow update actions for items created by the currently-authenticated user.
- In Item Permissions, set
- Delete: Custom (use the same Item Permissions as Update)
Create a 'Can View and Edit Own Profile' policy with the following permissions for the directus_users collection:
- Read: Custom
- In Item Permissions, set
idto$CURRENT_USERto only allow users to view their own profile.
- In Item Permissions, set
- Update: Custom (use the same Item Permissions as Read)
Enable Public Registration
Public registration allows any user to create a user in your Directus project directly from the Data Studio or via API.
Navigate to Project Settings → User Registration and enable the setting. Set the default role to 'Authenticated User'. New users will automatically be given this role, which gives them all of the permissions you set up in the previous step.
Set Up Your Astro Project
Initialize Your Project
Create a new Astro project by running npx create-astro@latest astro-auth.
When prompted, select the following configurations:
How would you like to start your new project? A basic, minimal starter (recommended)
Install dependencies? (recommended) Yes
Initialize a new git repository? (optional) No
Navigate into the project directory and install the Directus SDK by running npm install @directus/sdk.
Run the command npm run dev to start the development server and you should see the Astro project running on http://localhost:4321/ in your browser.
Configure the Directus SDK
First, create a .env file in the root of your project and add the following environment variables:
DIRECTUS_URL=https://your-directus-project-url.com
Next, update the astro.config.mjs file to render the application on the server as an SSR application:
// @ts-check
import { defineConfig } from 'astro/config';

// https://astro.build/config
export default defineConfig({
  output: "server"
});
- In the
srcdirectory, create alibdirectory and inside of it, create adirectus.tsfile to set up your Directus client with the authentication composable:
/// <reference types="vite/client" />
import { createDirectus, rest, authentication } from '@directus/sdk';

const DIRECTUS_URL = import.meta.env.DIRECTUS_URL;

const client = createDirectus(DIRECTUS_URL).with(rest()).with(authentication('cookie'));

export default client;
This will configure the directus client to use the authentication composable, and since Astro renders on the server, you will be using cookie method for authenticating users .
Implement User Registration
In the src/components directory, create a new file called AuthForm.astro:
---
interface Props {
  type: "login" | "register";
  action: string;
}

const { type, action } = Astro.props;
const isLogin = type === "login";
---

<div>
  <h1>{isLogin ? "Login" : "Register"}</h1>
  <form method="POST" action={action}>
    {!isLogin && (
      <>
        <label for="firstName">First Name</label>
        <input
          type="text"
          id="firstName"
          name="firstName"
          required
        />

        <label for="lastName">Last Name</label>
        <input
          type="text"
          id="lastName"
          name="lastName"
          required
        />
      </>
    )}

    <label for="email">Email</label>
    <input
      type="email"
      id="email"
      name="email"
      required
    />

    <label for="password">Password</label>
    <input
      type="password"
      id="password"
      name="password"
      required
    />

    <button type="submit">{isLogin ? "Sign in" : "Register"}</button>
    {isLogin ? (
      <p>
        Don't have an account?
        <a href="/register">Register</a>
      </p>
    ) : (
      <p>
        Have an account? <a href="/login">Login</a>
      </p>
    )}
  </form>
</div>
This form will be used in both the registration and login pages.
The action attribute in the AuthForm component will be used to send the form data to the server for registration.
To send the data to Directus for registration, you will need to create an API route. Create a new directory called api in the pages directory and inside of it, create a auth directory with a register.ts file with the content:
pages/api/auth/register.ts:
import type { APIRoute } from "astro";
import client from "../../../lib/directus";
import { registerUser } from "@directus/sdk";

export const POST: APIRoute = async ({ request, cookies, redirect }) => {
  const formData = await request.formData();
  const firstName = formData.get('firstName') as string;
  const lastName = formData.get('lastName') as string;
  const email = formData.get("email") as string;
  const password = formData.get('password') as string;

  if (!firstName || !lastName ||!email || !password) {
    return new Response("All fields are required", { status: 400 });
  }

  try {
    const response = await client.request(registerUser(email, password, { first_name: firstName, last_name: lastName }));

    // Auto-login the user if registration is successful
    const loginResponse = await client.login({ email, password });
    if (loginResponse.access_token) {
    cookies.set('directus_access_token', loginResponse.access_token);
  }
  } catch (error: any) {
    const message = error?.errors?.[0]?.message || 'Registration failed';
    return new Response(message, { status: 500 });
  }
  return redirect("/dashboard");
};
The code above:
- Parses the form data from the request and validates the required fields.
- Registers the user using the Directus SDK's
registerUserfunction. - Logs in the user automatically after registration.
- Redirects the user to the dashboard page upon successful registration.
To use the API route, create a new file called register.astro in the pages directory with the content:
---
import Layout from '../layouts/Layout.astro';
import AuthForm from '../components/AuthForm.astro';
---
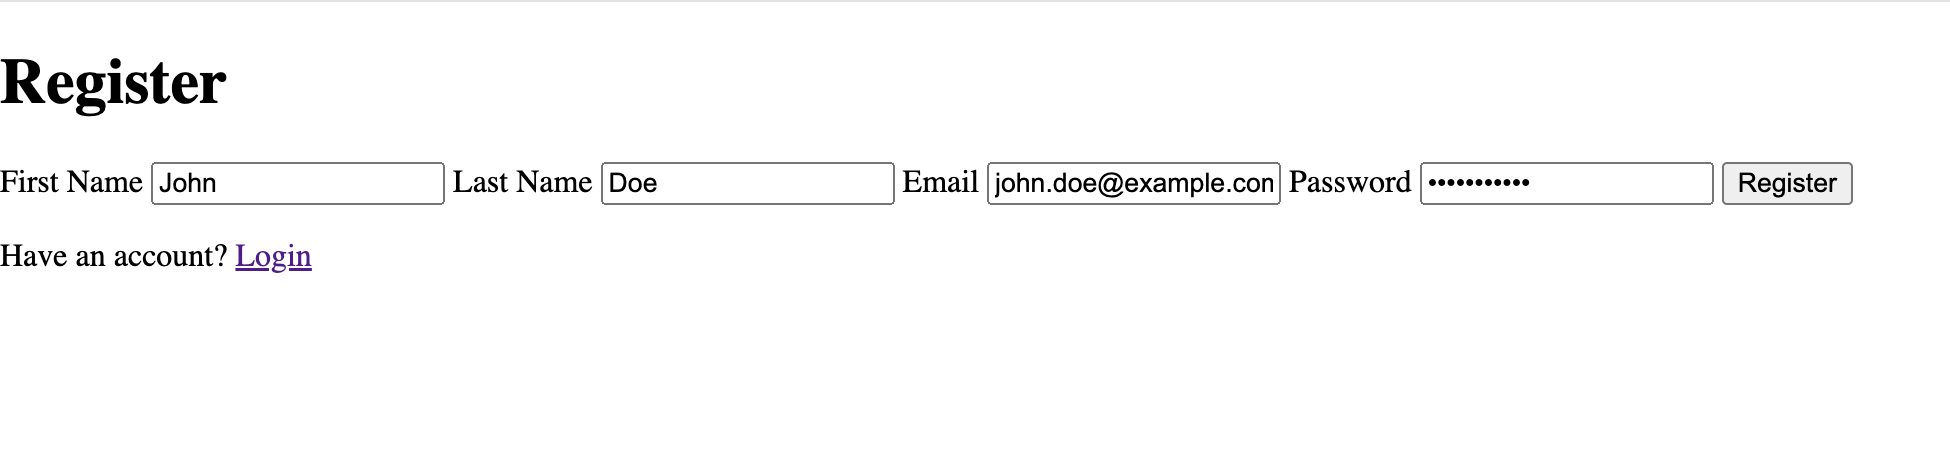
<Layout title="Register">
<main>
<AuthForm type="register" action="/api/auth/register" />
</main>
</Layout>
This will create a registration page with the form component:
When a new user registers, they will be automatically logged in and redirected to the dashboard page.
Implement User Login
In the api/auth directory, create a new file called login.ts with the content:
import type { APIRoute } from "astro";
import client from "../../../lib/directus";

export const POST: APIRoute = async ({ request, cookies, redirect }) => {
  const formData = await request.formData();
  const email = formData.get("email")?.toString();
  const password = formData.get("password")?.toString();


  if (!email || !password) {
    return new Response("Email and password are required", { status: 400 });
  }
  try {

    const response = await client.login({ email, password });
      if (response.access_token) {
        cookies.set('directus_session_token', response.access_token, { sameSite: 'strict', path: '/', secure: true });
      }
  } catch (error: any) {
    const message = error?.errors?.[0]?.message || 'Login failed';
        return new Response(message, { status: 500 });
  }

  return redirect("/dashboard")
};
The code above:
- Retrieves the form data from the request and validates the required fields.
- Logs in the user using the Directus SDK's
loginfunction. - Sets the
directus_session_tokencookie with the access token from the login response.
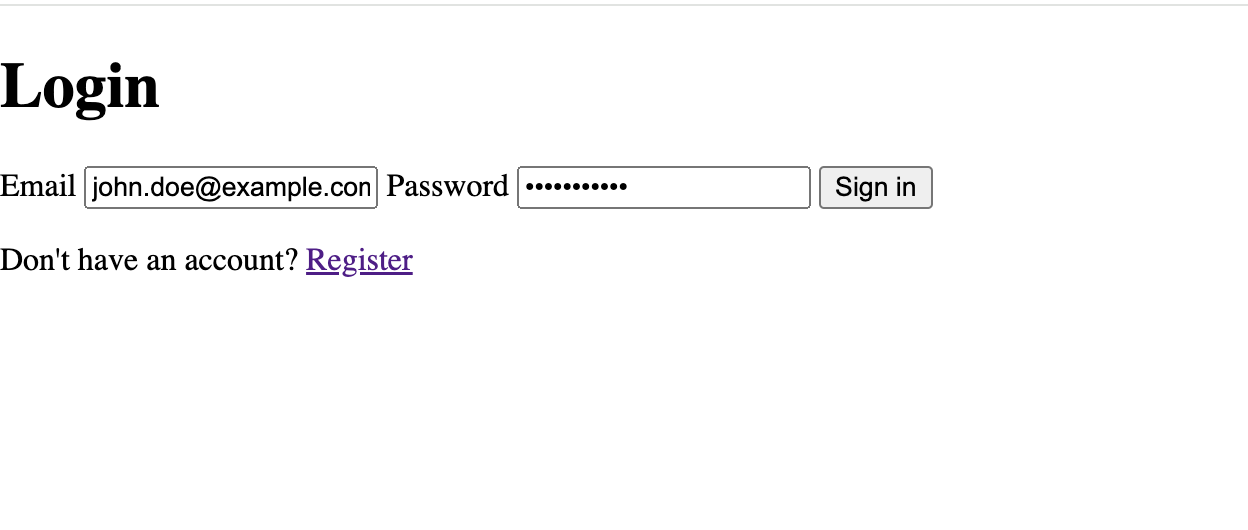
Using the AuthForm component created earlier, let's can create a login page by creating a new file called login.astro in the pages directory with the content:
---
import Layout from '../layouts/Layout.astro';
import AuthForm from '../components/AuthForm.astro';
---

<Layout title="Login">
  <main>
    <AuthForm action="/api/auth/login" type="login" />
  </main>
</Layout>
This will create a login page with the form component.
When a user logs in, they will be redirected to the dashboard page.
JSON Authentication Mode
The Directus SDK supports two authentication modes: cookie and json. The json mode is useful for client-side applications and the cookie mode for Server-side rendering (SSR) applications like Astro.
To use the json mode, update the directus.ts file in the lib directory to use the json mode:
import { createDirectus, rest, authentication } from '@directus/sdk';
import { DIRECTUS_URL } from "astro:env/client"

const client = createDirectus(DIRECTUS_URL as string).with(rest()).with(authentication('json'));

export default client;
Using this mode, you can authenticate users in client-side components and save the access token in local storage.
Using this mode will also provide you with a refresh_token that you can use to refresh the access token when it expires.
When using the json mode, you will need to handle the token refresh logic in your application.
For this tutorial, we will focus on the cookie mode for server-side rendering.
The cookie mode has no refresh token and is more secure as the access token is stored in an HTTP-only cookie.
Check if the User is Authenticated
Since the dashboard page should only be accessible to authenticated users, you need to check if the user is authenticated before rendering the page.
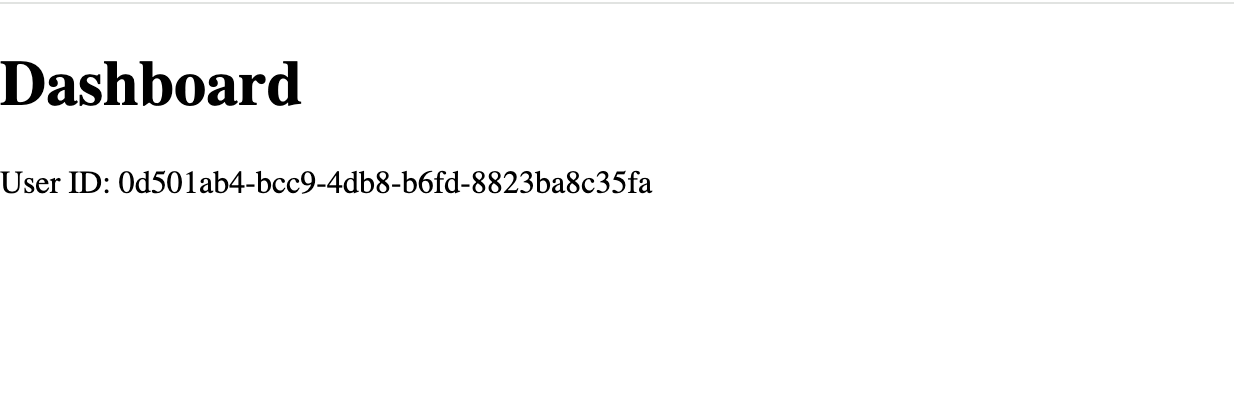
In the pages directory, create a directory called dashboard and inside of it a new file index.astro with the content:
---
import client from '../../lib/directus';
import { rest, readMe, withToken, readItems, refresh } from '@directus/sdk';
import Layout from '../../layouts/Layout.astro';

const token = Astro.cookies.get("directus_session_token");

if (!token) {
  return Astro.redirect("/login");
}
const response = await client.request(readMe())

const userId = response.id

---
{
  userId ? (
    <Layout>
      <h1>Dashboard</h1>
      <p>User ID: {userId}</p>
    </Layout>
  ): Astro.redirect("/login")
}
The code above sends a request to Directus to get the user's details using the readMe function. If the request is successful, the user ID is displayed on the dashboard page.
Ideally, in a real-world application, you would want to implement a middleware as a page guard to check if the user is authenticated before rendering the page.
Astro provides a detailed guide on how to implement middleware in your application.
Authenticate Requests
To authenticate requests to Directus, you need to include the access token in the request headers. When using the cookie mode, the access token is stored in an HTTP-only cookie, which is automatically sent with each request.
In the lib directory, update the directus.ts file to include the access token in the request headers:
import { createDirectus, rest, authentication } from '@directus/sdk';
import { DIRECTUS_URL } from "astro:env/client"

const client = createDirectus(DIRECTUS_URL as string).with(rest()).with(authentication('cookie', { credentials: 'include' }));

export default client;
Handling Errors
If a user tries to access a page they are not authorized to view, or if a record does not exist, Directus will return a 403 status code. You can handle this error by checking the response status code and redirecting the user to an error page.
Logging Out
To implement a logout feature, you can create an API route that invalidates and clears the access token cookie and redirects the user to the login page.
To do this, create a new file called logout.ts in the pages/api/auth directory with the content:
import type { APIRoute } from "astro";

export const GET: APIRoute = async ({ cookies, redirect }) => {
  cookies.delete("directus_session_token", { path: "/" });
  return redirect("/login");
};
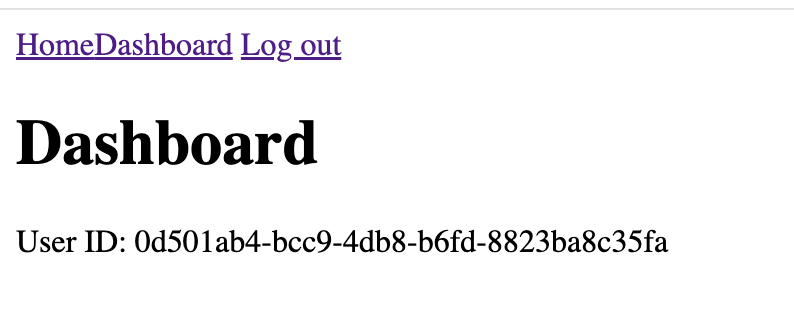
To use this API route, update the Layout.astro component to include a logout button:
---
interface Props {
  title?: string;
}

const { title = "Astro Basics" } = Astro.props;
const token = Astro.cookies.get("directus_session_token");

// Add navigation items with their access rules
const navItems = [
  { href: "/", label: "Home", public: true },
  { href: "/dashboard", label: "Dashboard", public: false },
];
---

<!doctype html>
<html lang="en">
  <head>
    <meta charset="UTF-8" />
    <meta name="viewport" content="width=device-width" />
    <link rel="icon" type="image/svg+xml" href="/favicon.svg" />
    <meta name="generator" content={Astro.generator} />
    <title>{title}</title>
  </head>
  <body>
    <nav>
      {navItems.map(item => (
        (item.public || token?.value) && (
          <a href={item.href}>{item.label}</a>
        )
      ))}
      {
        token?.value && (
       <a href="/api/auth/logout">Sign out</a>
        )
      }
    </nav>
    <slot />
  </body>
</html>
Whenever a user clicks the 'Sign out' button, they will be logged out and redirected to the login page.
Making Authorized Requests
With the authentication system in place, you can now create posts as a logged-in user. Remember the posts collection you created in Directus? You can now create a new post with the logged-in user as the author.
Create a New Post
To create a new post, first create a new component called PostForm.astro in the components directory:
---
interface Props {
  action: string;
  title?: string;
  content?: string;
  id?: string;
}

const { action, title = '', content = '', id } = Astro.props;
---

<form method="POST" action={action}>
  {id && <input type="hidden" name="id" value={id} />}

  <div>
    <label for="title">Title:</label>
    <input
      type="text"
      id="title"
      required
      name="title"
      value={title}
    />
  </div>

  <div>
    <label for="content">Content:</label>
    <textarea
      id="content"
      name="content"
      required
    >{content}</textarea>
  </div>

  <button type="submit">
    {id ? 'Update post' : 'Create post'}
  </button>
</form>
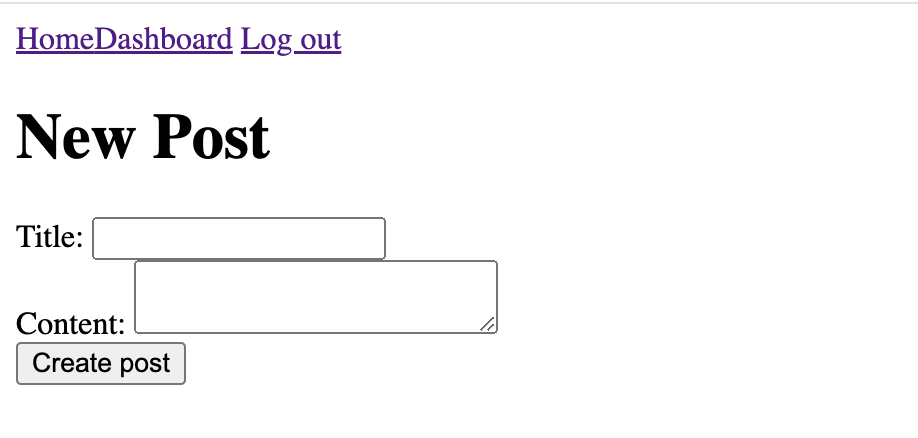
Next, let's create a new directory called posts in the /pages/dashboard/ directory and inside of it, create a new file called new.astro with the content:
---
import Layout from '../../../layouts/Layout.astro';
import NewPostForm from '../../../components/Posts.astro';

const token = Astro.cookies.get("directus_session_token");

if (!token) {
  return Astro.redirect("/login");
}


---
<Layout>
  <h1>New Post</h1>
  <PostForm action="/api/posts/new" />
</Layout>
This render the PostForm component in the /dashboard/posts/new/ page
When a user submits the form, the data will be sent to the server to create a new post. To handle this, create a new API route called new.ts in the pages/api/posts directory:
import type { APIRoute } from "astro";
import client from "../../../lib/directus";
import { createItem } from "@directus/sdk";

export const POST: APIRoute = async ({ request, cookies, redirect }) => {
  const formData = await request.formData();
  const title = formData.get("title")?.toString();
  const content = formData.get("content")?.toString();

  if (!title || !content) {
    return new Response("Title and content are required", { status: 400 });
  }
  try {
    const token = cookies.get("directus_session_token")?.value;
    console.log(token);
    if (!token) {
      return new Response("Authentication token is missing", { status: 401 });
    }
    const response = await client.request(createItem("posts", {
      title,
      content,
    }))
    return redirect("/dashboard");
  } catch (error: any) {
    const message = error?.errors?.[0]?.message || 'Failed to create post';
    console.error(error.errors);
        return new Response(message, { status: 500 });
  }
};
This will create a new post in the posts collection with the title and content provided in the form.
When a user submits the form, a new post will be created and the user will be redirected to the dashboard page.
List Posts
In the dashboard page, you can list all the posts created by the logged-in user. To do this, update the index.astro page in the /dashboard to fetch and display the posts:
---
import client from '../../lib/directus';
import { rest, readMe, withToken, readItems, refresh } from '@directus/sdk';
import Layout from '../../layouts/Layout.astro';

const token = Astro.cookies.get("directus_session_token");

if (!token) {
  return Astro.redirect("/login");
}
const response = await client.request(readMe())

const userId = response.id
const posts = await client.request(readItems('posts'));

---
{
  userId ? (
    <Layout>
      <h1>Dashboard</h1>
      <p>User ID: {userId}</p>
      {
    posts && posts.map((post) => (
      <div>
        <h2>{post.title}</h2>
        <p>{post.content}</p>
        <a href={`/dashboard/posts/${post.id}`}>edit post</a>
      </div>
    ))
  }
    </Layout>
  ): Astro.redirect("/login")
}
This will display all the posts created by the logged-in user on the dashboard page.

Edit a Post
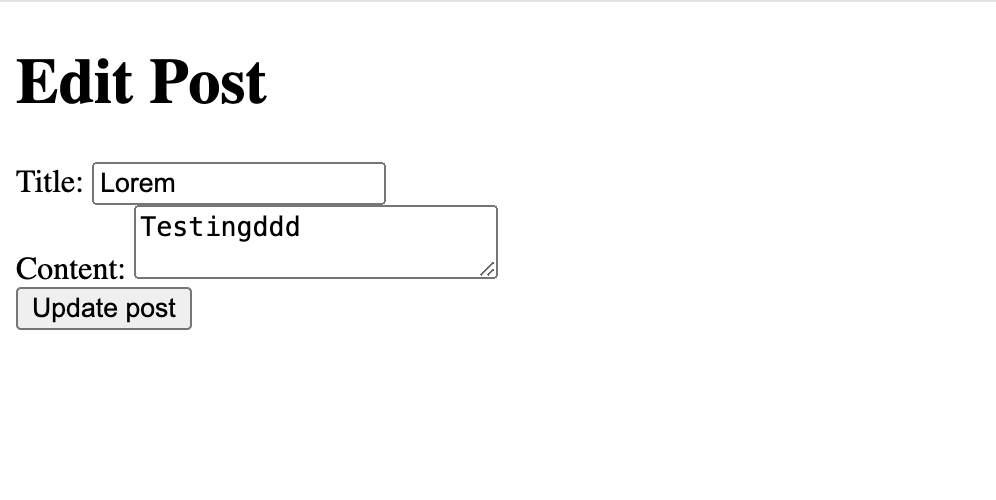
To edit a post, create a new page called [id].astro in the /pages/dashboard/posts/ directory using the PostForm component created earlier:
---
import { readItem } from '@directus/sdk';
import client from '../../../lib/directus';
import PostForm from '../../../components/PostForm.astro';
import Layout from '../../../layouts/Layout.astro';
export function getStaticPaths() {
  return [
    {params: {id: ""}},

  ];
}

const { id } = Astro.params;
const post = await client.request(readItem("posts", id))
---
<Layout title="Edit Post">
  <div>
    <h1>Edit Post</h1>
    <PostForm action="/api/posts/update" {...post}  />
  </div>
</Layout>
This page will first fetch the post data using the readItem function and the id of the post and then render the PostForm component with the post data.
When a user submits the form, the data will be sent to the server to update the post. To handle this, create a new API route called update.ts in the pages/api/posts directory:
import type { APIRoute } from "astro";
import client from "../../../../lib/directus";
import { createItem, updateItem, withToken } from "@directus/sdk";

export const POST: APIRoute = async ({ request, cookies, redirect }) => {
  const formData = await request.formData();
  const title = formData.get("title") as string;;
  const content = formData.get("content") as string;;
  const id = formData.get("id") as string;

  try {
    const token = cookies.get("directus_session_token")?.value;
    if (!token) {
      return new Response("Authentication token is missing", { status: 401 });
    }
    const response = await client.request(updateItem("posts", id, {
      title,
      content,
    }))
    console.log(response);
    return redirect("/dashboard");
  } catch (error: any) {
    const message = error?.errors?.[0]?.message || 'Failed to update post';
    console.error(error.errors);
        return new Response(message, { status: 500 });
  }
};
When a user submits the form, the post will be updated and the user will be redirected to the dashboard page.
Conclusion
In this tutorial, you learned how to implement authentication in your Astro application using Directus. You created a registration and login system, implemented user authentication, and created, read, updated posts. You also learned how to handle errors and log out users.