Submit Forms Using Directus and SvelteKit
Directus provides a headless CMS, which when combined with SvelteKit will streamline content management. This post covers how to connect them to create and submit forms.
Before You Start
You will need:
- A new Directus project with admin access.
- Optional but recommended: Familiarity with data modeling in Directus.
- Set Up Your Directus Project
Set Up Your Directus Project
You'll need to configure CORS for this project. Update your compose.yml file as follows:
CORS_ENABLED: "true"
CORS_ORIGIN: "http://localhost:5173"
CORS_CREDENTIALS: "true"
Configure Directus with the necessary collections and permissions.
Apply the CMS Template
Use the Directus Template CLI to apply the CMS template for your project.
First, generate a static token for the admin user by going to the Users Directory. Choose the Administrative User, and scroll down to the Token field and generate a static token. Copy the token and save it. Do not forget to save the user, or you will encounter an "Invalid token" error.
Open your terminal, run the following command, and follow the prompts:
npx directus-template-cli@latest apply
Choose Community templates, and select the CMS template. Fill in your Directus URL, and select Directus Access Token as the authentication method, filling in the token created earlier.
Form Submission Model
The CMS template contains a form submission model. This is used to store the data submitted by users using the forms created in Directus.

The form submission model is a generic collection that relates form fields to the form submission.
Form Submission Access
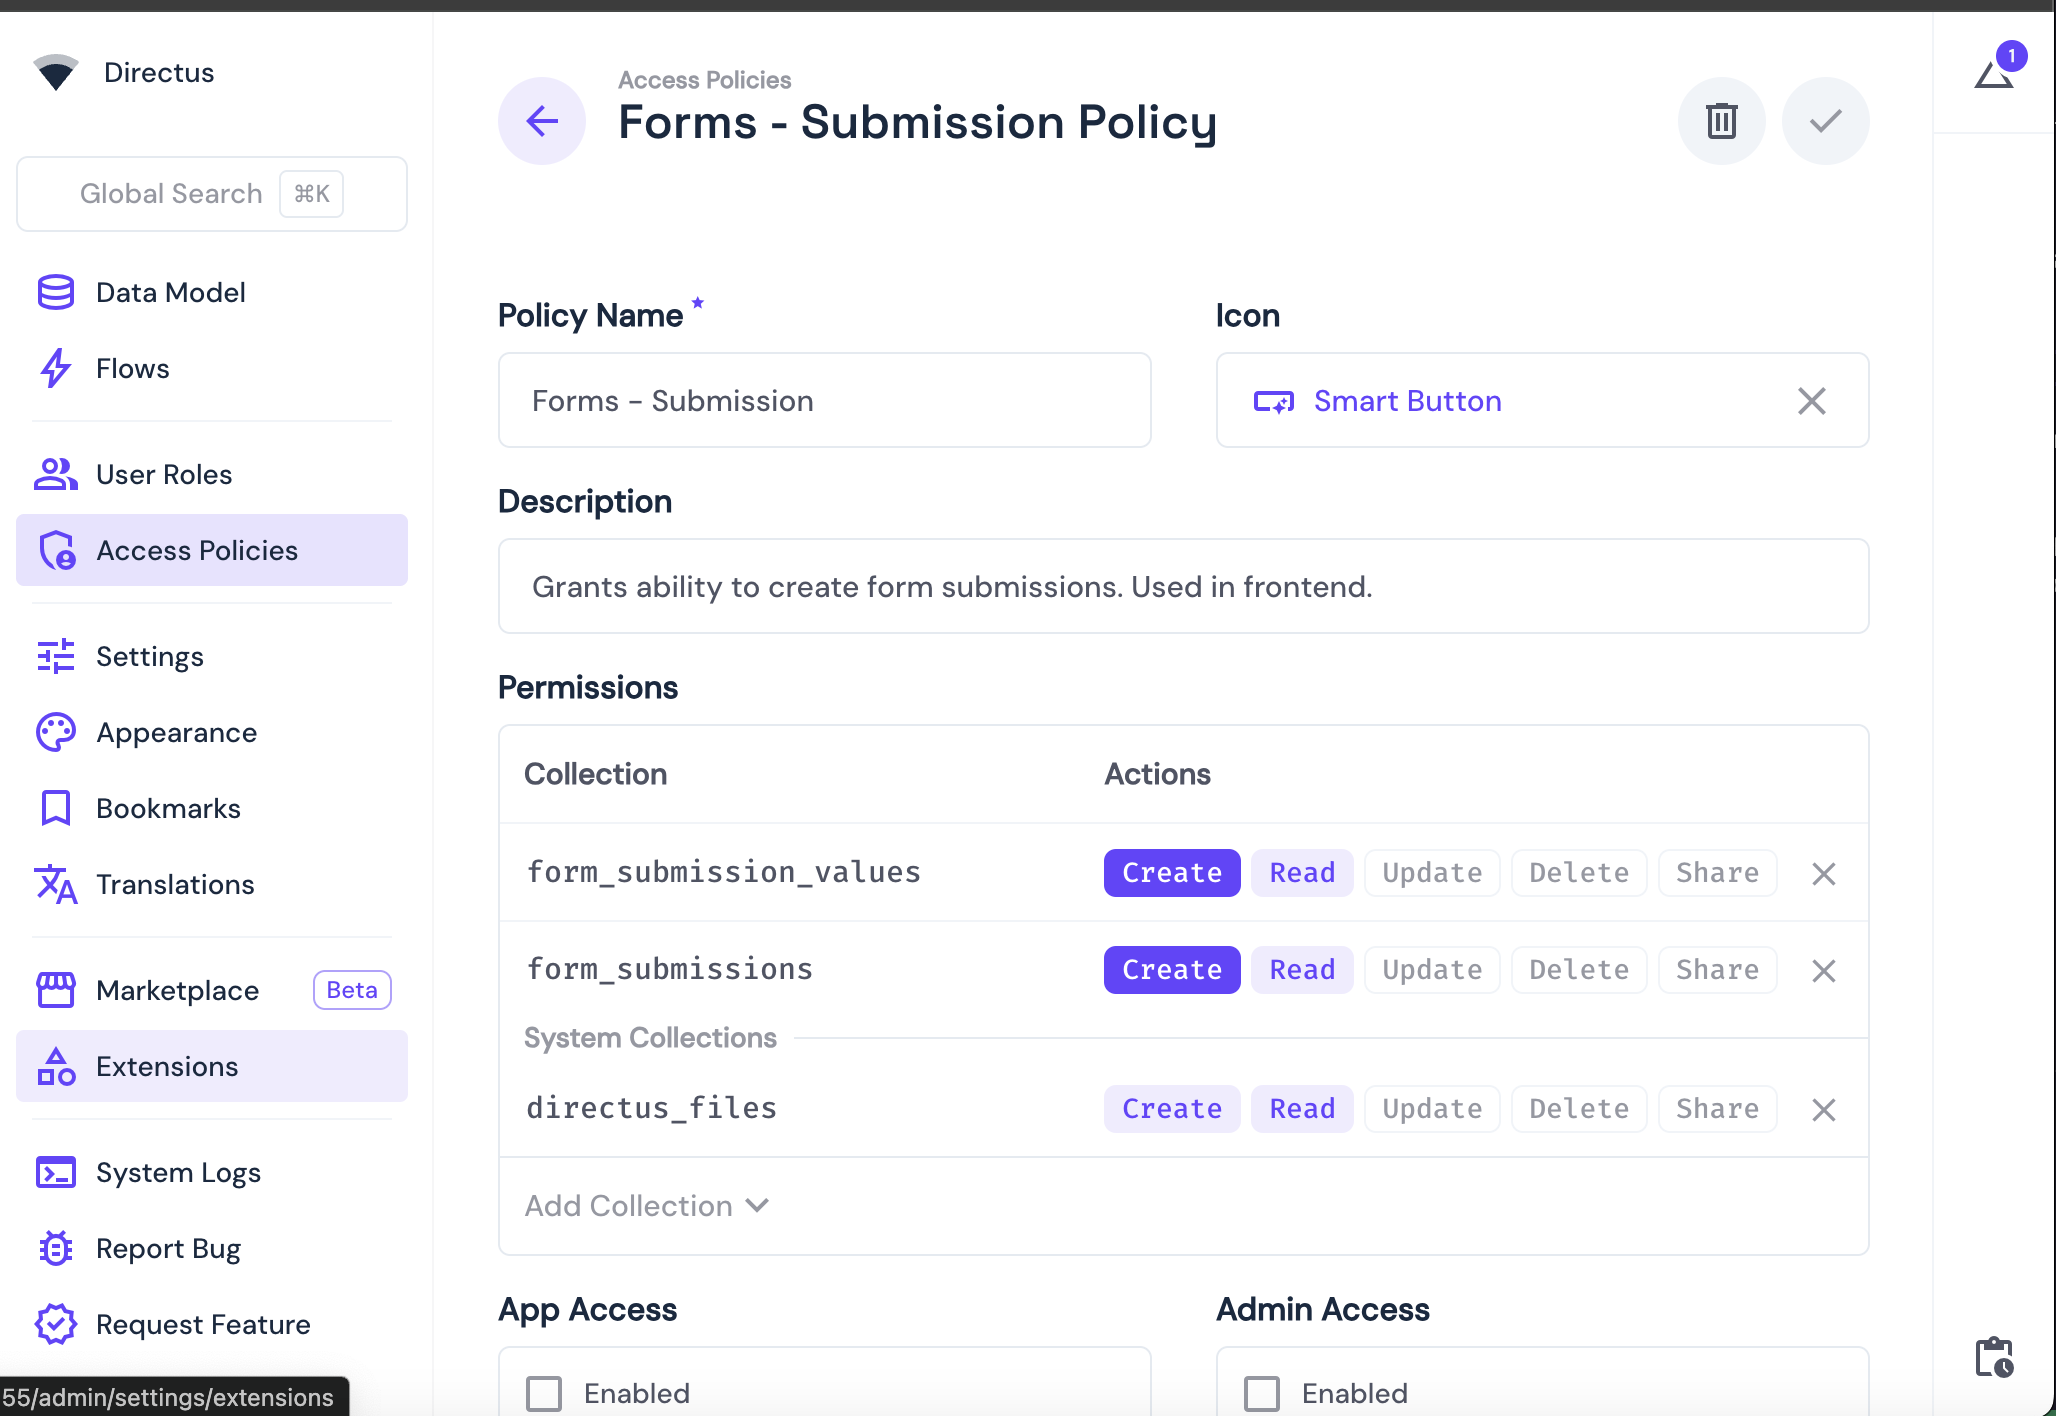
The template also sets up a system user called Frontend Bot, created for the form submission model and already set up with the necessary permissions. It is used to control access to the form submission data.

You also need to create an SDK key for the Frontend Bot user. To do this, navigate to the Directus user directory, select the "Frontend Bot" user, and scroll down to the "Token" section. Generate a token and save the user. This token will be used to authenticate the SvelteKit application with Directus and will have the form submission permissions required to submit the form.
Set Up Your SvelteKit Project
Initialize Your Project
To start building, you need to install SvelteKit and Directus SDK. Run this command to install SvelteKit:
npx sv create form_submissions
When prompted, select SvelteKit minimal as the template. Do not add type checking, as this tutorial is implemented in JavaScript. Your output should look like this:
 Welcome to the Svelte CLI! (v0.6.16)
│
◇  Which template would you like?
│  SvelteKit minimal
│
◇  Add type checking with Typescript?
│  No
│
◆  Project created
│
◇  What would you like to add to your project? (use arrow keys / space bar)
│  none
│
◇  Which package manager do you want to install dependencies with?
│  npm
│
◆  Successfully installed dependencies
│
◇  Project next steps ─────────────────────────────────────────────────────╮
│                                                                          │
│  1: cd form_submissions                                                       │
│  2: git init && git add -A && git commit -m "Initial commit" (optional)  │
│  3: npm run dev -- --open
Afterward, cd into your project directory and install the Directus SDK by running this command:
npm install @directus/sdk
Configure the Directus SDK
To set up your Directus client with the authentication composable, create a file called directus.js inside the ./src/lib directory. Add the following code:
import { createDirectus, staticToken, rest } from '@directus/sdk';

export const directus = createDirectus('http://localhost:8055')
 .with(staticToken('YOUR_FRONTEND_BOT_TOKEN'))
 .with(rest());
Create the Page with the Form
You need to create a form-submission object with a name and email address field.
In Directus, visit Content -> Forms. Notice 2 forms are included with the CMS template. We will be using the one called "Newsletter". Click on it, and you will see it contains 2 form fields: "first-name" and "email." Also, take note of the URL of this page; it will be something similar to http://localhost:8055/admin/content/forms/5da3d356-d818-434f-b225-db35c418bbb6. Copy all the characters after the last /, it is required to identify the form being submitted in the next step.
Create a subdirectory called form in the ./src/routes/ directory. Inside it, create a +page.svelte file. Add the following code:
<script>
 import { onMount } from 'svelte';
 import { directus } from '$lib/directus';
 import { readItem, createItem } from '@directus/sdk';

 let form = null;
 let fields = [];

 const formId = '5da3d356-d818-434f-b225-db35c418bbb6'; // your form ID

 onMount(async () => {
    const response = await directus.request(
      readItem('forms', formId, {
        fields: ['*', 'fields.*']
 })
 );

 form = response;
 fields = response.fields.map(field => ({
 field: field.id,
 value: ''
 }));
 });

 const submitForm = async () => {
 await directus.request(
 createItem('form_submissions', {
 form: formId,
 values: fields
 })
 );
 };
</script>

{#if form}
 <form on:submit|preventDefault={submitForm}>
 {#each form.fields as field, i}
 <label for={field.name}>{field.label}</label>
 <input
 id={field.name}
 type={field.type || 'text'}
 placeholder={field.placeholder}
 bind:value={fields[i].value}
 required={field.required}
 />
 {/each}
 <button type="submit">{form.submit_label || 'Submit'}</button>
 </form>
{:else}
 <p>Loading form...</p>
{/if}
Note: Replace the
formIdwith the ID of the form you copied from Directus.
The code above defines a simple form in SvelteKit that lets users submit their name and email. It uses two variables (name and email) to capture input values and sends them to Directus via the createItem function from the Directus SDK.
When the form is submitted, it sends a request to the form_submissions collection in Directus, including the form ID and the IDs of the specific form fields being filled.
Form Flows
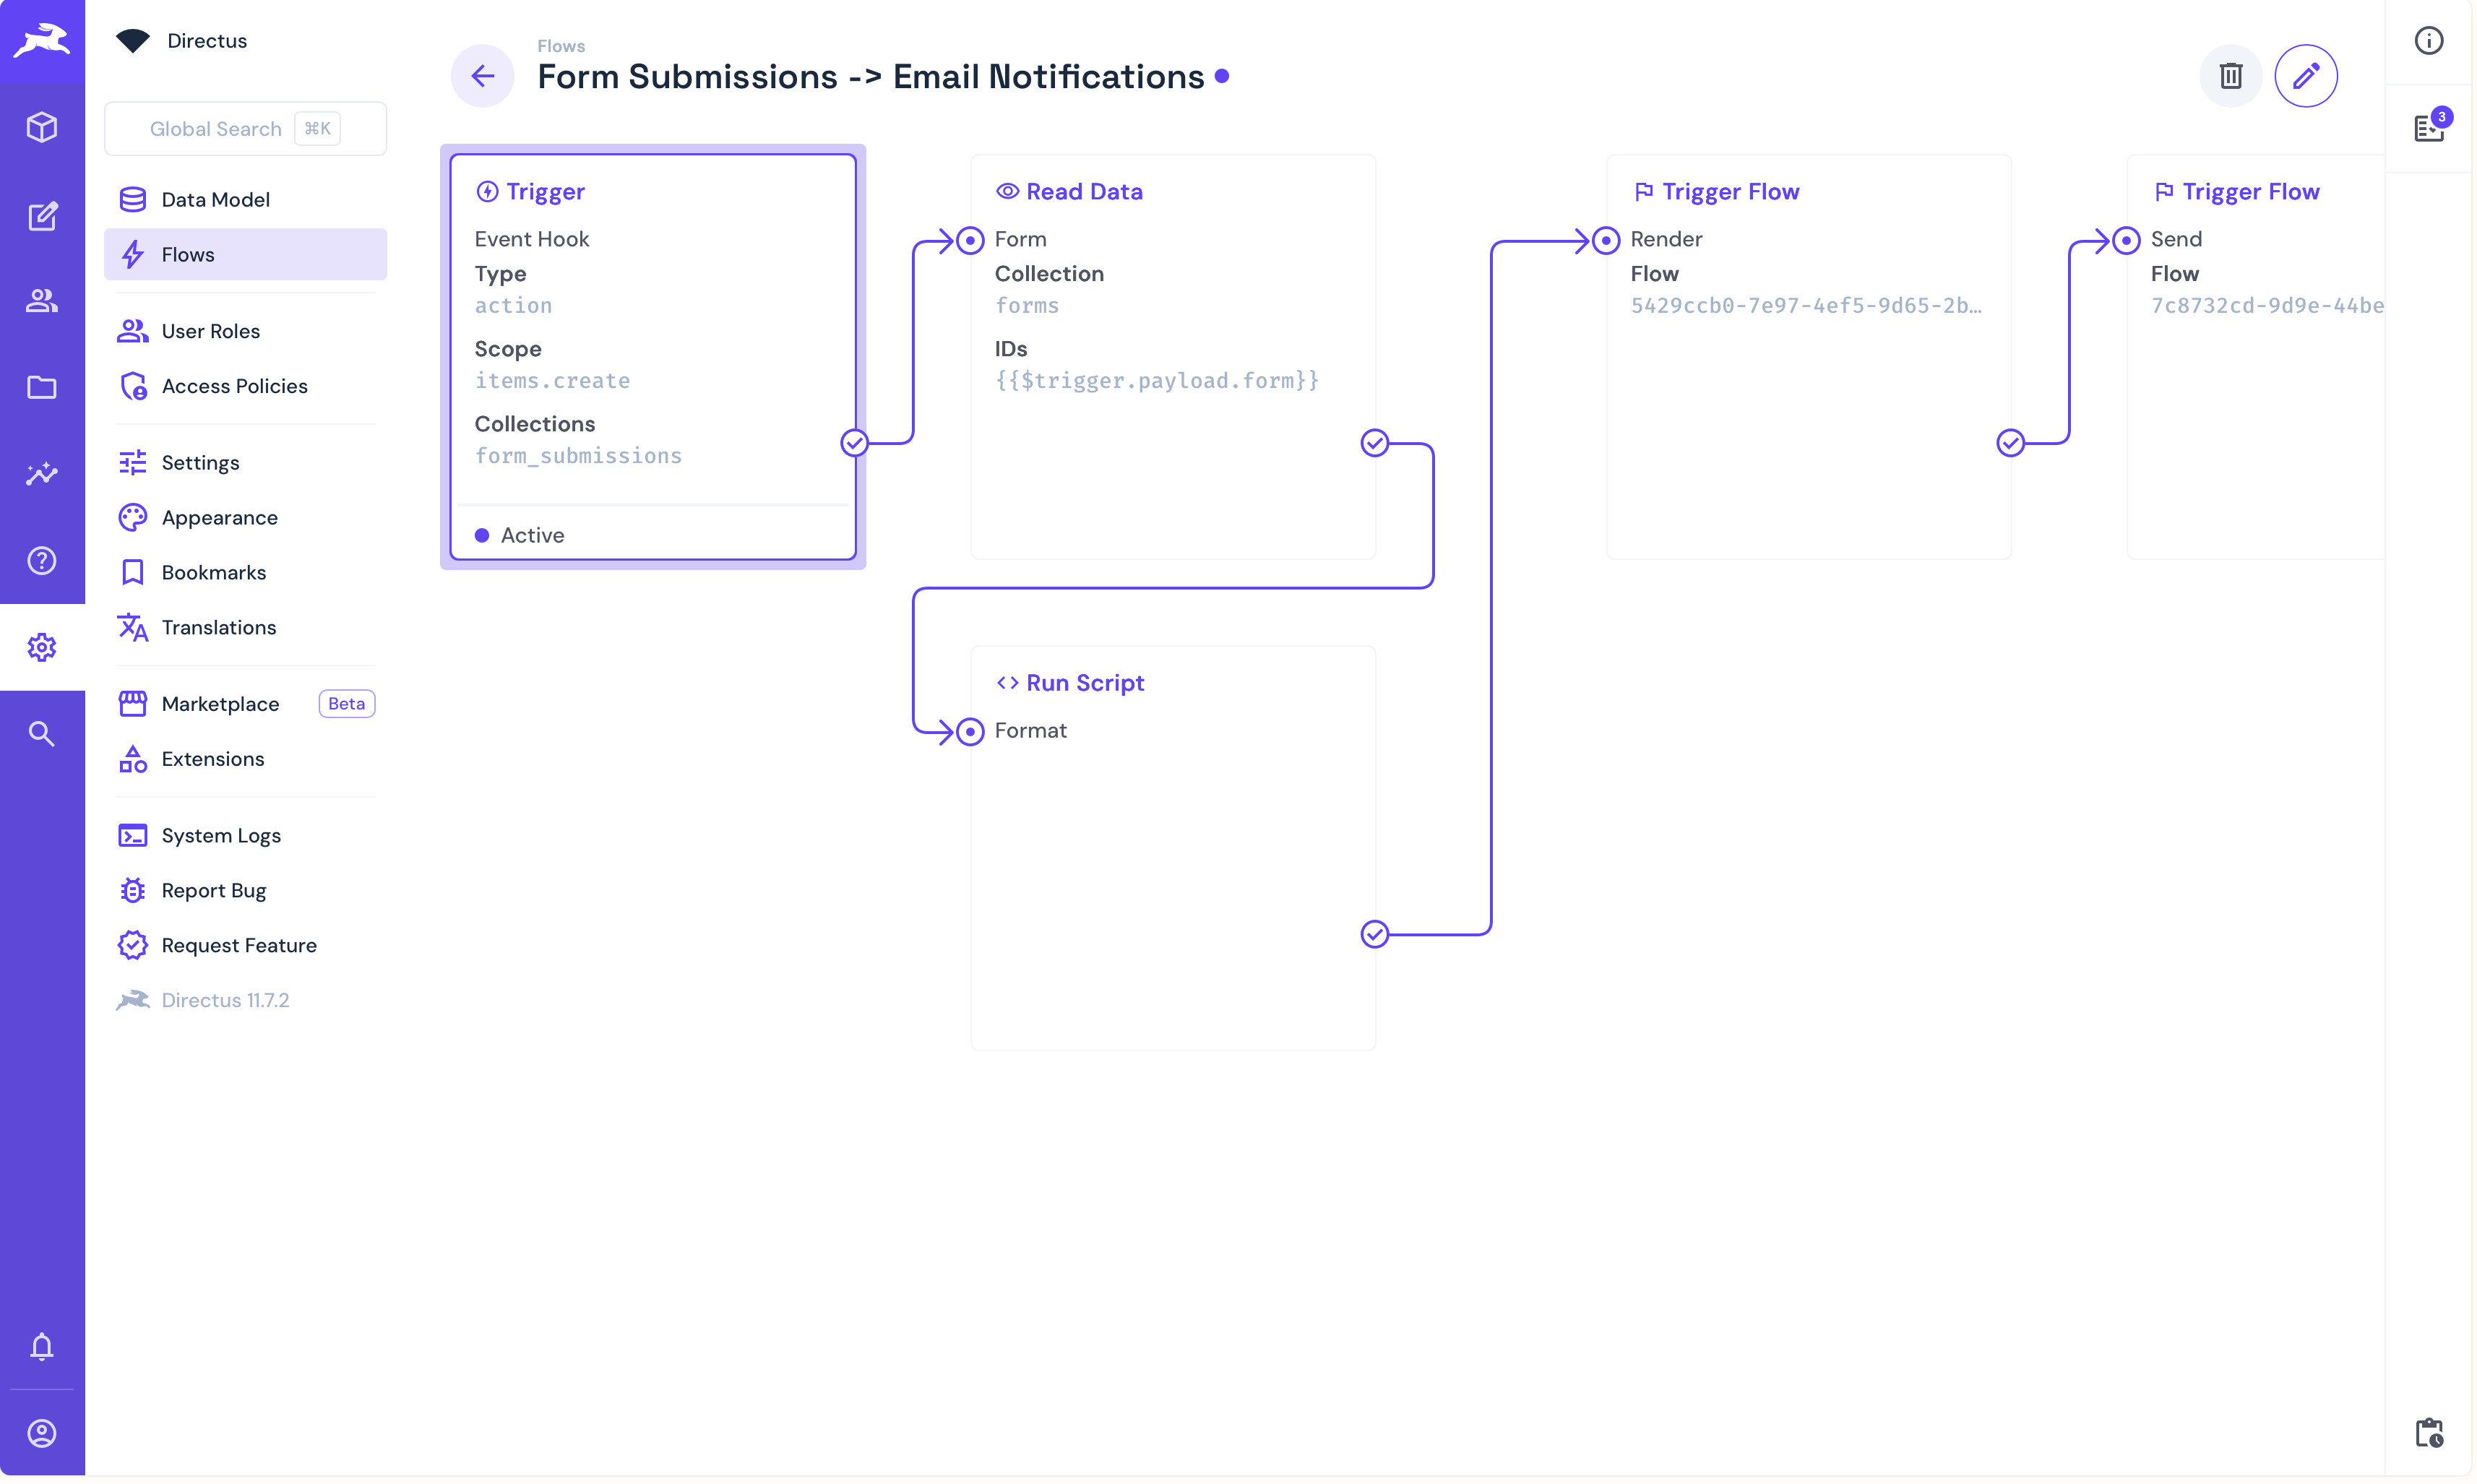
Part of a standard form submission flow is to send an email notification to the user. The Directus CMS template includes a flow that handles this.

The flow is triggered whenever a new form submission is created. It starts by using the form ID to fetch the relevant form data. Then, a custom JavaScript step runs to validate and format the submission for email use. After that, a separate render flow generates the email content using Liquid templates, and finally, another flow sends the email to the user.
Form Validation and Error Handling
To complete the form flow, we need to give users feedback when a submission succeeds or fails. Replace your .src/routes/form/+page.svelte code with this:
<script>
 import { onMount } from 'svelte';
 import { directus } from '$lib/directus';
 import { readItem, createItem } from '@directus/sdk';

 let form = null;
 let fields = [];
 let error = '';
 let success = false;

 const formId = '5da3d356-d818-434f-b225-db35c418bbb6';

 onMount(async () => {
    try {
 const response = await directus.request(
        readItem('forms', formId, {
          fields: ['*', 'fields.*']
 })
 );

 form = response;
 fields = response.fields.map(field => ({
 field: field.id,
 value: ''
 }));
 } catch (err) {
 error = 'Failed to load form.';
 console.error(err);
 }
 });

 const submitForm = async () => {
 error = '';
 success = false;

 const missing = fields.some((f, i) => {
 const meta = form.fields[i];
 return meta.required && !f.value.trim();
 });

 if (missing) {
 error = 'Please fill in all required fields.';
 return;
 }

 try {
 await directus.request(
 createItem('form_submissions', {
 form: formId,
 values: fields
 })
 );

 success = true;
 fields = form.fields.map(field => ({
 field: field.id,
 value: ''
 }));
 } catch (err) {
 error = 'Form submission failed.';
 console.error(err);
 }
 };
</script>

{#if error}
 <p style="color: red;">{error}</p>
{/if}

{#if success}
 <p style="color: green;">Form submitted successfully!</p>
{/if}

{#if form}
 <form on:submit|preventDefault={submitForm}>
 {#each form.fields as field, i}
 <label for={field.name}>{field.label}</label>
 <input
 id={field.name}
 type={field.type || 'text'}
 placeholder={field.placeholder}
 bind:value={fields[i].value}
 required={field.required}
 />
 {/each}
 <button type="submit">{form.submit_label || 'Submit'}</button>
 </form>
{:else}
 <p>Loading form...</p>
{/if}
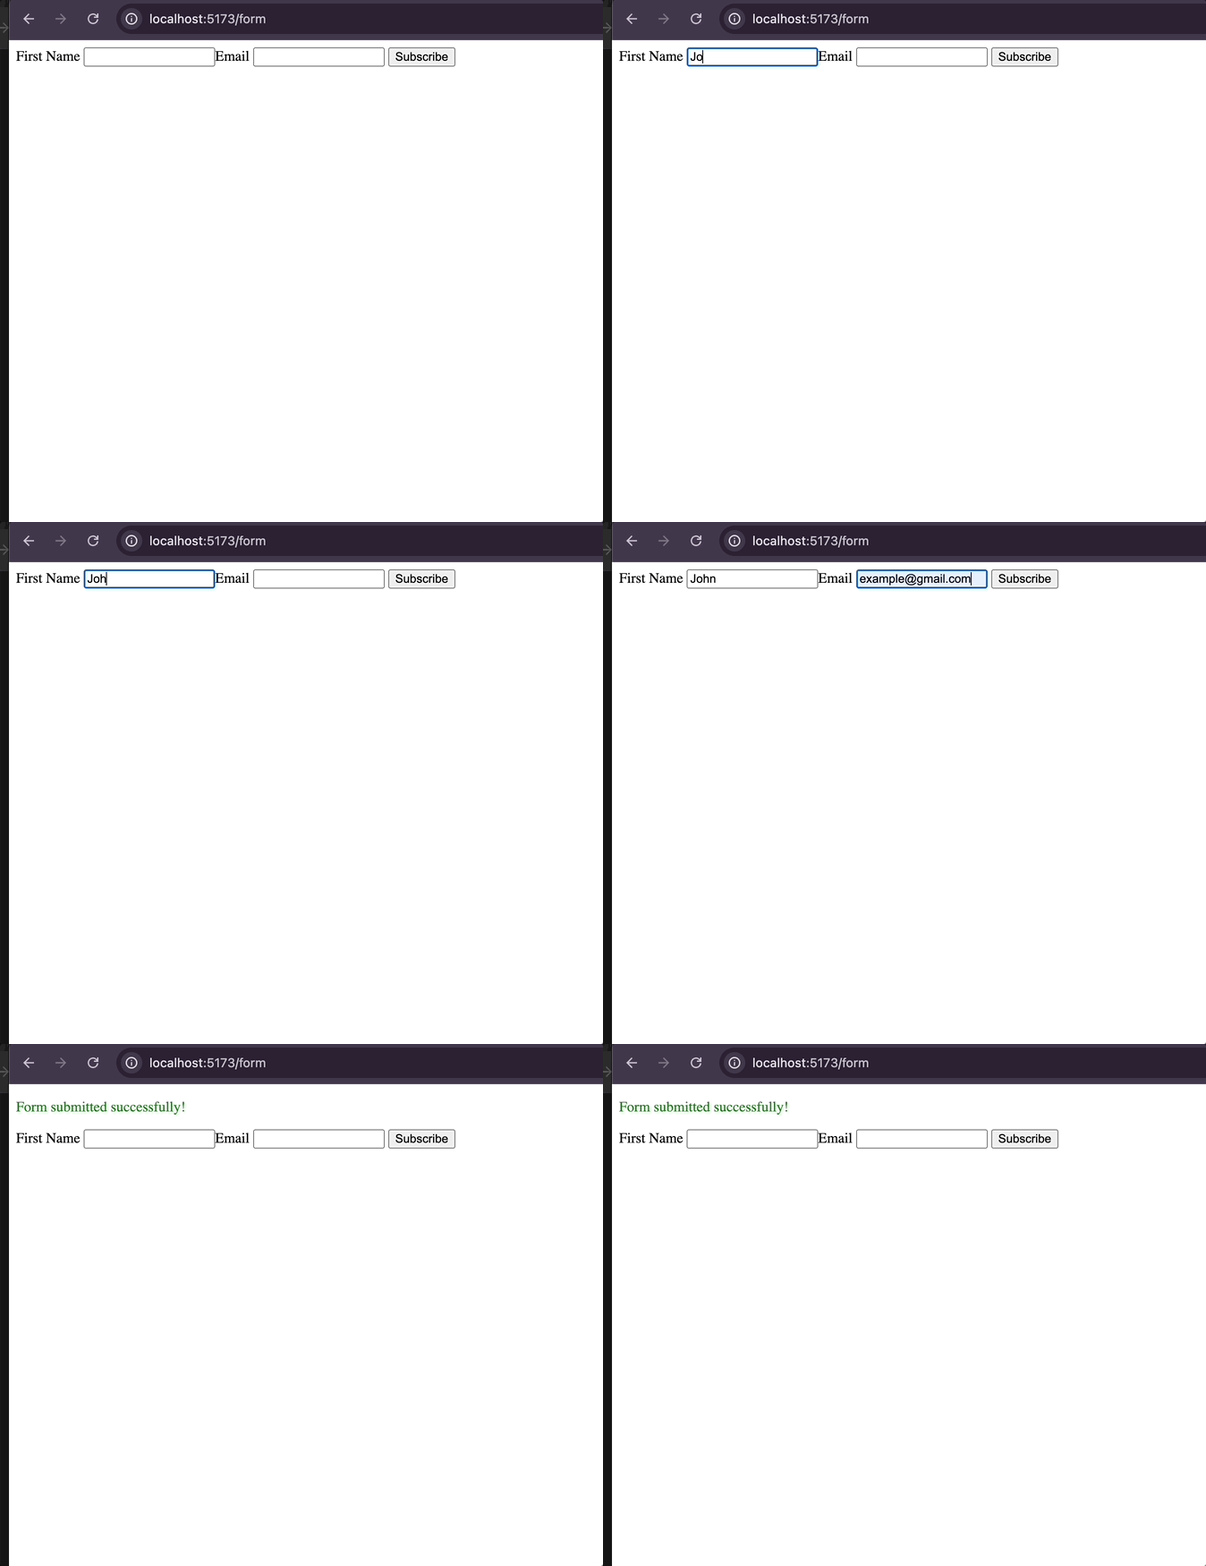
This handles both client-side validation and error-catching from the API. If the submission fails, the error is shown. If it succeeds, the form will reset, and a confirmation message will be displayed.
Test the Application
To test the application, run this command:
npm run dev
Afterward, open http://localhost:5173/form in your browser. You should see your form displayed:

Conclusion
With the Directus CMS template, you can build dynamic, CMS-powered forms that handle structured submissions and store data in real-time.